Ceramic tiles are a favored option in numerous households. They offer longevity, elegance, and simple upkeep. However, the first cleaning after installation is crucial. It sets the stage for how your ceramic floors will look and last over time. In this blog, you’ll learn the proper steps for cleaning your new ceramic floors. We will cover everything from preparation to maintenance.
Understanding Ceramic Floors
Ceramic floors are popular among homeowners for their durability and appealing appearance. To keep these floors looking great and performing well, it’s essential to know the various types of ceramic tiles and the typical problems that can occur after they are installed.

Types of Ceramic Floors
Ceramic floors are primarily categorized into two types: glazed and unglazed.
- Glazed tiles feature a lustrous coating that not only improves their visual appeal but also simplifies cleaning. This reflective surface offers strong protection against stains and moisture, making it suitable for busy areas or places that are likely to experience spills.
- Conversely, unglazed tiles do not have this glossy finish. They are more porous and can absorb liquids and stains more readily. For this reason, unglazed tiles may require particular cleaning techniques to maintain their best condition.
Determining the type of tile you have is important. It will help you choose the right cleaning products and methods to effectively care for your new floors.
Common Issues After Installation
After the installation of your new ceramic floors, you might encounter several common issues. A common issue is grout haze, which appears as a white residue on tiles after grouting. Grout haze not only detracts from the floor's appearance but can also make it look dull and uninviting.
In addition to grout haze, dust and debris from the installation process often accumulate on the surface. It's not uncommon to find leftover tile adhesive as well, which can pose further challenges. Addressing these issues during your first cleaning is essential for ensuring your new ceramic floors look their best.
By understanding the types of ceramic floors and the common post-installation issues, you can prepare effectively for your first cleaning. This knowledge will guide you in selecting the appropriate tools and techniques to maintain the beauty and longevity of your ceramic tiles.
Preparing for the First Cleaning
When it comes to your new ceramic floors, preparing for the first cleaning is a crucial step. This approach helps preserve your tiles' value and keeps them looking their best. Here’s what you need to consider.

Timing of Cleaning
Before you start cleaning, you need to wait a little. It’s recommended to wait at least 24 to 48 hours after installation. This waiting period allows the grout to cure properly. If you clean too soon, you may damage the grout or spread the haze around.
Tools and Supplies Needed
You’ll require certain tools and materials for the cleaning task. Here’s a list to help you prepare:
- Soft broom or vacuum cleaner: Use this to remove loose dust and debris.
- Mops: A microfiber or sponge mop works best for ceramic tiles.
- Have two buckets ready: one with the cleaning solution and another for rinsing.
- Cleaning solution: Choose a pH-neutral cleaner made for ceramic tiles.
- Grout haze remover: If your tiles have grout haze, you will need a special cleaner.
- Soft cloths or sponges: They work well to both dry and polish the tiles.
With these tools on hand, you will be ready for a successful cleaning session.
Enhance Your Cleaning with the Robot Vcuum
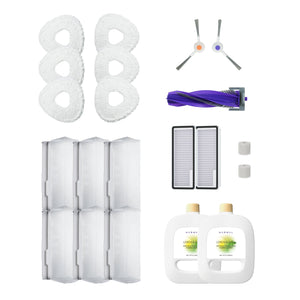
To elevate your cleaning experience, consider using the Narwal Freo Z Ultra robotic vacuum and mop. This innovative device is designed specifically for effective cleaning on various surfaces, including new ceramic floors.
Key Features of the Narwal Freo Z Ultra
[cta:narwal-freo-z-ultra-robot-vacuum-mop]
- Dual Functionality: The Freo Z Ultra combines vacuuming and mopping in one streamlined process. This dual functionality allows it to pick up dust and debris while simultaneously mopping, ensuring that your new tiles are spotless.
- Smart Navigation: With its sophisticated navigation system, the Freo Z Ultra effortlessly maneuvers around furniture and steers clear of obstacles. This minimizes the risk of scratching or damaging your new ceramic tiles, as the robot can clean around edges and corners effectively.
- Customizable Cleaning Modes: The device offers multiple cleaning modes, allowing you to choose a gentle setting for your new tiles. This is crucial for avoiding excess moisture, which can harm grout lines and the integrity of the tiles themselves.
- High-Quality Water Control: You can organize cleaning times using an easy-to-use app. This feature lets you program the robot to clean when it’s convenient for you, keeping your floors spotless without needing to do it yourself.
- Self-Cleaning Function: After cleaning, the Freo Z Ultra automatically cleans its mop pads. This feature prevents the spread of dirt back onto your newly installed floors, maintaining a consistently high cleaning standard.
- Scheduling and Remote Control: A convenient app lets you plan cleaning sessions, so you can choose the best times for the robot to work, keeping your floors spotless with no need for hands-on effort.
By integrating the Narwal Freo Z Ultra into your cleaning routine, you can tackle the challenges of maintaining new ceramic floors effortlessly. This robotic vacuum and mop not only simplifies the process but also ensures that common issues—like scratches from manual mopping or excess water damage—are effectively avoided.
Steps for Cleaning New Ceramic Floors
Cleaning your new ceramic floors may feel overwhelming, but following the proper steps can simplify the task. By adhering to these guidelines, your tiles will remain in excellent condition and appear immaculate.

Initial Sweep or Vacuum
Start by removing dirt and dust from the floor with a broom or vacuum. This crucial step helps eliminate loose dust and debris. Having a clean surface will facilitate the following steps significantly. Make sure to focus on cleaning around the corners and edges. This will help you avoid scratching the tiles later.
Addressing Grout Haze
Grout haze is one of the biggest challenges when cleaning new ceramic floors. It is a white film left over from the grout used between tiles. You cannot remove it with plain water. Instead, you need a grout haze remover.
- Choose a Grout Haze Remover: You can either purchase a store-bought cleaner or create your own solution. For a homemade cleaner, mix white vinegar and warm water in equal parts.
- Apply the Solution: Use a nylon-bristle brush to apply the remover. Clean in small areas, using a gentle scrubbing motion.
- Rinse: Once you've scrubbed an area, wash it off with fresh water. Then, use a wet grout sponge to clean the tiles. Remember to change your rinsing water often.
- Repeat: Continue this process until all grout haze is removed. It might require some time, but it is crucial for achieving a tidy result.
Mopping the Tiles

Once the grout haze is gone, it’s time to mop the tiles. This action will eliminate any leftover dust and debris.
- Prepare Your Mop and Cleaning Solution: Fill one bucket with your pH-neutral cleaner mixed with warm water. Add fresh water to the second bucket for rinsing.
- Mop the Floor: Begin at one corner and move through the room methodically. Use the mop to spread the cleaning solution, ensuring the tiles don’t get too wet.
- Rinse the Mop Often: After mopping a section, rinse the mop in the clean water bucket. This helps avoid spreading dirt around.
- Dry the Surface: After you’ve mopped, grab a dry microfiber mop or a soft cloth to wipe down the tiles. This will help eliminate streaks and water marks.
Drying the Surface
Once you’ve finished mopping, let the tiles dry thoroughly. A dry microfiber mop can help accelerate the drying time. Drying is important for maintaining the shine and preventing water spots. Once dry, step back and admire your freshly cleaned ceramic floors.
Post-Cleaning Maintenance Tips
Once your ceramic floors are freshly cleaned, it’s important to establish a routine for ongoing maintenance. This will help keep your floors looking beautiful and extend their lifespan.

Regular Cleaning Schedule
After your first cleaning, it’s vital to maintain your ceramic floors. Establish a consistent cleaning routine. This should involve:
- Dry cleaning: Employ a gentle broom or vacuum on a weekly basis to clear away dust and debris.
- Wet cleaning: Mop the floors with a pH-neutral cleaner every few weeks.
- Deep cleaning: Consider doing a deep clean every few months. This can involve using a steam cleaner or specialized tile-cleaning solutions.
Handling Stains and Spots
Stains can happen, even on the best ceramic floors. If something spills, clean it immediately. For stubborn stains, combine baking soda and water into a paste. Apply this paste to the stain, allow it to rest for several minutes, and then gently scrub with a nylon brush. Rinse with clean water.
Protecting Your Floors
To keep your ceramic floors looking new, use mats and rugs in high-traffic areas. This will help avoid scratches. Also, place felt pads beneath furniture legs to protect the tiles.Taking these small steps will greatly extend the life of your floors.
What to Avoid
Keeping your ceramic floors in top condition means avoiding certain practices. Steering clear of common errors will help keep your tiles looking stunning and extend their lifespan.

Harsh Chemicals and Abrasives
When cleaning your ceramic tiles, refrain from using strong chemicals. They can harm the finish and dull the appearance of the tiles. Additionally, avoid using abrasive cleaners or scrub pads. They can scratch the surface, ruining its appearance.
Ignoring Grout Maintenance
Cleaning your tiles is important, but do not forget about the grout. Grout is porous, which makes it prone to gathering dirt and grease. To maintain its cleanliness, scrub the grout lines frequently. After cleaning, think about using a grout sealer to prevent staining.
Conclusion
Properly cleaning new ceramic floors initially is crucial for their look and longevity. Following these tips will ensure your tiles remain beautiful for years to come. Regular maintenance and care will help you enjoy the benefits of ceramic flooring. Keep your tiles clean and protected, and they will serve you well in your home.
FAQ
1. How frequently should I clean my ceramic tiles?
Regular cleaning should include dry cleaning once a week and wet cleaning every few weeks. You can perform a deep clean every few months.
2. How should I handle scratches if I spot them on my ceramic floor?
If you notice scratches, consider using a polishing compound designed for ceramic tiles. For deeper scratches, you may need to consult a professional for repair.
3. Is it safe to clean my ceramic floors with a steam cleaner?
Yes. Just be sure to adhere to the guidelines provided by the manufacturer and steer clear of too much moisture, as it may harm the grout.


