Do you dread cleaning your bathroom? You’re not alone. Many people find bathroom cleaning to be a challenging and time-consuming task. However, keeping your bathroom clean is essential for hygiene and comfort, reducing bacteria and allergens.
In this guide, we will walk you through each step of the cleaning process, while introducing a game-changer: the Narwal Freo Z Ultra robot vacuum, which can simplify your cleaning routine.
Cleaning Supplies Checklist
Before we dive into the cleaning steps, let’s gather the necessary supplies.

Cleaning Agents
- Multi-Surface Cleaner: Ideal for countertops and tiles.
- Disinfectant: Crucial for eliminating germs, particularly in frequently touched spots like faucets and toilets.
- Glass Cleaner: Tailored for glass and mirror surfaces, it effectively eliminates water spots and dirt.
- Toilet Bowl Cleaner: A dedicated cleaner designed specifically for the toilet bowl.
- Grout Cleaner/Mildew Remover: Consider these for tough stains commonly found in bathrooms.
Tools
- Brushes and Sponges: For scrubbing various surfaces, especially tiles and bathtubs.
- Rubber Gloves: Shield your hands from strong chemicals.
- Mop and Bucket: For cleaning the floor and ensuring a thorough job.
- Trash Bags: To gather waste while you clean.
Other Helpful Supplies
- Microfiber Cloths: Excellent for cleaning surfaces while preventing scratches.
- Old Toothbrush or Small Brush: Perfect for cleaning hard-to-reach corners, like faucet crevices.
- Vinegar and Baking Soda: Eco-friendly cleaners that effectively remove tough stains.
Essential Smart Assistants for Bathroom Cleaning: Narwal Freo Z Ultra
[cta:narwal-freo-z-ultra-robot-vacuum-mop]
Choosing the right equipment can greatly improve how you clean your bathroom. The Narwal Freo Z Ultra is not just an ordinary robot vacuum; it’s a cutting-edge cleaning companion designed to tackle the unique challenges of bathroom maintenance. Here’s how this innovative device can elevate your cleaning routine.
Advanced Navigation and Real-Time Adaptation

The Narwal Freo Z Ultra features dual RGB cameras and advanced AI technology. This allows it to map your bathroom efficiently and navigate around obstacles. It identifies furniture, bathtubs, and other fixtures, ensuring it doesn’t miss a spot. The 360-degree scanning creates a detailed 3D map, which helps it plan the most effective cleaning route.
The robot’s AI also allows it to make real-time decisions based on the condition of the surfaces it encounters. For instance, if it detects a spill, it automatically adjusts its cleaning method to tackle the mess effectively. This is especially beneficial in bathrooms prone to water spills.
Powerful Suction for Deep Cleaning

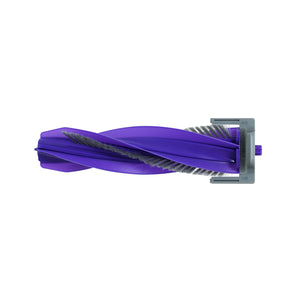
With an impressive suction power of 12000Pa, the Freo Z Ultra can easily lift hair, dust, and other debris commonly found in bathrooms. This powerful suction guarantees the removal of even the toughest grime, resulting in a pristine bathroom. The powerful suction is paired with an innovative cleaning brush designed to avoid tangling, making it suitable for homes with pets.
Dual Cleaning Modes: Vacuum and Mop
What sets the Narwal Freo Z Ultra apart is its dual cleaning capability. It can effortlessly alternate between vacuuming and mopping. This feature is perfect for bathrooms, where both dry and wet cleaning are often necessary.
- Vacuum Mode: Ideal for removing dry dirt and hair from floors, it effectively cleans under cabinets and around toilets.
- Mop Mode: Equipped with two mops that scrub at 180 RPM, the Freo Z Ultra tackles tough stains like soap scum and hard water deposits. The mop pads are heated, enhancing their cleaning power to ensure a deep clean.
Self-Cleaning Mop Technology
One of the standout features of the Freo Z Ultra is its self-cleaning capability. After completing a cleaning cycle, it automatically cleans its mop pads using hot water, preventing the spread of grime and odors. This means you’ll always have fresh cleaning pads ready for the next use, making maintenance a breeze.
Smart Waste Disposal System

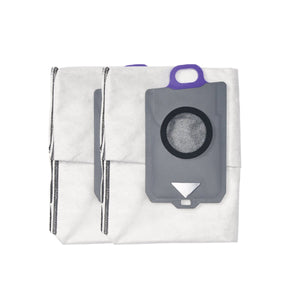
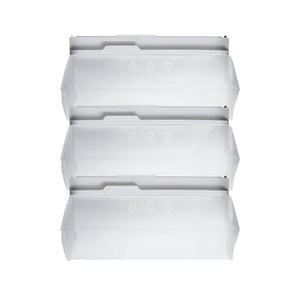
The Narwal Freo Z Ultra features a smart waste disposal system that keeps wet and dry waste separate. This helps keep your bathroom clean and minimizes the risk of bad smells. The robot self-empties into a 2.5-liter dust bag that can hold dust for up to 120 days, minimizing the need for frequent maintenance.
With all the necessary tools ready, let's clean the bathroom by dividing it into areas and following the specified order! Let's get started!
Bathroom Cleaning Steps by Area in Order
Ensure your bathroom is properly aired out before cleaning. Crack open the windows or turn on the ventilation fan. Put on rubber gloves to protect your hands.
To ensure a thorough clean, follow these detailed steps in order. Each area of the bathroom has specific tasks to tackle, making the cleaning process more manageable.
Step 1: Clear the Bathroom

- Remove all items: Take everything off the countertops, including toiletries, decorative items, and towels. Set them aside in a specific location away from the bathroom.
- Organize: While clearing items, look for any expired products or unused items. Discard or recycle them to declutter.
Note: Keep small items in a caddy for easier access later.
Step 2: Clean the Ceiling

- Duster or microfiber cloth: Use a long-handled duster or a microfiber cloth on a pole.
- Dusting method: Begin in one corner of the ceiling and move across to the other side. Gently sweep the duster along the edges where dust tends to accumulate, paying special attention to corners and light fixtures.
- Cobweb removal: If you see cobwebs, ensure to get into the corners and crevices, moving from top to bottom.
Tip: For stubborn cobwebs, use a damp cloth to capture dust effectively.
Step 3: Clean the Walls and Tiles

- Moisture wipe: Begin at the top and use a moist microfiber cloth to clean the walls, working your way down to prevent streaking.
- Tile cleaner application: Apply a tile cleaner using a sponge or a soft brush. Concentrate on spots showing stains or mildew, particularly near the sink and shower.
- Stubborn stains: For stubborn stains, apply a vinegar and water solution to the problem areas. Let it sit for a few minutes before scrubbing with a sponge.
Stubborn stains: For mold or mildew, a mixture of water and bleach (1:10) can be effective. Let it sit before scrubbing.
Cleaning Tip: Use a toothbrush for grout lines; this helps to get into tight spaces.
Step 4: Clean the Showerhead

- Remove the showerhead: If possible, detach it from the pipe for easier cleaning.
- Vinegar soak: Submerge the showerhead in a bowl of vinegar for 30 minutes. This helps dissolve mineral deposits.
- Rinse thoroughly: After soaking, rinse the showerhead under hot water to remove any remaining buildup before reattaching it.
Tip: Use a toothbrush to scrub the nozzle if mineral buildup persists after soaking.
Step 5: Clean the Vanity

- Choose the correct cleaner: Opt for a product suited to your vanity's material (wood, laminate, etc.).
- Thorough cleaning: Spray the cleaner onto the surface and then wipe it with a microfiber cloth. Focus particularly on the edges and seams where grime accumulates.
- Drain area: Pay special attention to the sink drain; use an old toothbrush to scrub around it and remove any debris.
Step 6: Toilet Cleaning

- Turn off the water supply: Locate the valve at the rear of the toilet and turn it clockwise to stop the flow of water.
- Drain the toilet: Flush the toilet to remove most of the water.
- Dispense the cleaner: Coat the interior of the toilet bowl with the toilet bowl cleaner, making sure to include the area under the rim. Allow it to sit for a minimum of 10 minutes.
- Scrub thoroughly: Utilize a toilet brush to clean the bowl, focusing on any stains and the area under the rim. For the exterior, spray an all-purpose cleaner and wipe with a sponge or cloth.
Step 7: Floor Cleaning
- Clear the floor: Sweep or vacuum to collect any dirt and debris. Be sure to reach into corners and around fixtures.
- Use the Narwal Freo Z Ultra: Set it to work on the floor. With its powerful 12000Pa suction, it effectively picks up dirt and dust. Its automatic cleaning function keeps the mop pads fresh, ideal for maintaining your bathroom.
- Manual touch-up: After the robot has completed its cycle, inspect the floor for any missed spots and touch up as necessary with a damp mop.
Tip: For sticky spots, pre-treat with a cleaning solution before running the robot.
Note: Ensure the floor is clear of obstacles to allow the robot to clean effectively.
Step 8: Clean Bathtub or Shower

- Use a tub or shower cleaner: Mist the walls and base of the tub or shower, allowing it to sit for several minutes.
- Scrubbing: Use a non-scratch sponge or brush to scrub the surfaces, focusing on grout lines and any soap scum build-up.
- Rinse thoroughly: Use hot water to rinse off all cleaner residues, ensuring no soap scum is left behind.
Challenging stains: For soap scum, mix baking soda with water to form a paste. Apply it, allow it to sit, then scrub.
Attention: Steer clear of harsh cleaners that might damage the bathtub or tile surfaces.
Step 9: Clean Mirrors and Glass

- Glass cleaner application: Spray a glass cleaner or a vinegar-water mixture directly onto the mirror.
- Buff with a microfiber cloth: Move in circles to prevent streaking, starting at the top and moving downward.
Tip: For streaks, wipe with crumpled newspaper after the initial clean for a sparkling finish.
Step 10: Clean Drains and Mats

- Clear drains: Remove any visible debris from sink and shower drains. Use a small brush or your fingers to remove hair and clutter.
- Mats cleaning: Remove bath mats and shake them outside to remove dust. Follow care instructions for washing them—most can be machine washed.
- Final steps: Ensure mats are thoroughly dry before putting them back.
Note: If drains smell, sprinkle baking soda followed by vinegar, letting it fizz before rinsing with hot water.
Adhering to these thorough steps will leave your bathroom pristine and welcoming.
Final Touches
Return all items to their places. Replace towels and mats with fresh ones, ensuring the bathroom looks neat and inviting.
Tips for Maintaining a Clean Bathroom
Maintaining a tidy bathroom can be easy. With a few straightforward habits and smart design choices, you can keep your space shining with little effort. Here are some useful tips for a consistently clean bathroom.

- Quick Daily Tidying: Spend a few moments each day wiping down the sinks and countertops. After showers, use a squeegee on walls to prevent soap scum.
- Regular Deep Cleaning Schedule: Set aside time each week for scrubbing the toilet and mopping the floor. Monthly, wash bath mats and check for mold.
- Use the Right Products: Choose gentle cleaners for daily use and reserve stronger ones for tough stains. This keeps surfaces protected and clean.
- Organize and Declutter: Store toiletries in cabinets or baskets. Regularly remove expired products to keep the space tidy.
- Invest in Easy-Clean Fixtures: Select smooth surfaces for countertops and tiles to simplify cleaning. Fixtures installed on the wall help maintain clear floors.
- Ventilation: Turn on exhaust fans while showering and after to lower moisture levels and avoid mold growth. Open windows for better air circulation.
- Seal Grout and Tiles: Apply grout sealer every six months to prevent stains. Choose non-porous tiles for easier maintenance.
- Laundry Routine for Textiles: Wash towels every three to four days and clean bath mats regularly to eliminate odors.
- Quick Fix for Stains: Tackle spills immediately to prevent setting. Store a compact cleaning set beneath the sink for convenient reach.
- Use a Robot Vacuum: Consider a robot vacuum like the Narwal Freo Z Ultra to automate floor cleaning, saving time and ensuring a tidy space.
Conclusion
This guide outlines essential techniques for maintaining a gleaming bathroom. A clean space not only boosts comfort but also supports improved hygiene. Elevate your cleaning routine with the Narwal robot vacuum—your smart assistant for effortless cleanliness. Embrace these methods and enjoy a fresh, inviting space that feels like a retreat!
FAQs
What steps can I take to stop soap scum from forming in the shower?
To prevent soap scum, rinse the shower walls after each use, and consider using a daily shower cleaner spray to minimize buildup.
Is vinegar safe for all surfaces?
No, while it's an effective natural cleaner, steer clear of using it on natural stone as it can harm the material.
How can I ensure my bathroom has a fresh aroma?
To maintain a fresh scent, routinely take out the trash, utilize air fresheners or essential oils, and think about placing an open box of baking soda to absorb smells.


