Dust first and then vacuum. Your vacuum doesn’t just push dust around, making cleaning easier. Knowing the right order to clean can greatly improve the efficiency of your cleaning job. We'll explain why dusting first and then vacuuming is the best approach, as well as tips for dusting, vacuuming, and reducing dust in your home to help you create a healthier, dust-free space.
Why Should You Dust First?
Dusting removes most of the loose dust and debris from furniture and surfaces. This way, when vacuuming, the vacuum cleaner mainly deals with dust that has already fallen to the floor, rather than dust that has fallen again from the furniture. This reduces the workload and time when vacuuming, and improves cleaning efficiency.
During the dusting process, loose dust and debris are removed, reducing the chance of them floating in the air. This helps reduce the level of allergens and pollutants in the indoor air, which is better for the health of occupants.
If you vacuum first and then dust, the vacuum cleaner may blow up dust that has already fallen to the floor again, or blow dust from the furniture to the floor. Dusting first avoids this and ensures that the vacuum cleaner can more effectively remove dust and dirt from the floor.
How to Dust: Tools and Steps
Dusting your home is essential for maintaining a fresh and tidy environment. By using the right tools and following a systematic process, you can easily remove dust and allergens from your home. Here are the tools and steps to make dusting effective and efficient.
Essential Dusting Tools
To make dusting more efficient, start by choosing the right tools.
Microfiber Cloths: These clothes are highly effective at capturing dust rather than merely displacing it. Being reusable and environmentally friendly, they constitute an excellent option for routine dust removal.
Feather Duster: Feather dusters are ideal for accessing high places such as ceiling fans, light fixtures, and the tops of tall furniture, as they are gentle and well-suited for delicate surfaces.
Static Dusters: These specialized dusters attract dust using static electricity, making it easier to lift dust off surfaces.
Dusting Spray: For stubborn dust or greasy surfaces, a dusting spray helps break down dirt and prevents future buildup.
Step-by-Step Dusting Guide
Now that you have your tools ready, follow these steps for efficient dusting.
- Start at the Top: Start by dusting high surfaces, including ceiling fans, light fixtures, and the tops of cabinets, to prevent dust from settling onto the already-cleaned lower areas.
- Work Your Way Down: Dust shelves, furniture, and electronics in a systematic way. Make sure to dust delicate items carefully and use a microfiber cloth or static duster for electronics to avoid damaging them.
- Use Gentle Motions: When dusting, avoid rapid movements that can push dust into the air. Instead, use gentle, sweeping motions to capture dust on your cloth or duster.
- Place dust and dirt into a trash bag: After dusting, carefully gather the dust and debris and dispose of them into a trash bag to keep your space clean.
- Pay Attention to Hidden Areas: Remember to dust behind furniture, underneath appliances, and along baseboards, as these areas are prone to collecting the highest amounts of dust.
How to Vacuum: Tools and Steps
Vacuuming is the second step after dusting to ensure that all dust and debris are removed from your floors and carpets. Using the right tools and technique can make a significant difference in how effective your vacuuming routine is.

Essential Vacuuming Tools—Narwal Freo Z Ultra
The Narwal Freo Z Ultra is an advanced cleaning solution that combines powerful suction with intelligent mapping and cleaning technology. With its self-cleaning capabilities, it can handle both vacuuming and mopping tasks efficiently, making it a game-changer for modern homes.
Strong suction performance: Equipped with 12000Pa of powerful suction, the Narwal Freo Z Ultra is capable of efficiently eliminating 99% of particles present on hard floor surfaces. Whether it is dust, fine debris, or pet hair, it can easily suck up to ensure that the floor is thoroughly clean.
Real-time cleaning decisions: Freo Z Ultra is equipped with dual AI chips and dual 136° RGB cameras, which can monitor the ground conditions in real time and make corresponding cleaning decisions. For example, when dry debris is detected, the device automatically switches to vacuuming mode, and when dealing with wet spills, it will raise the brush head and start mopping mode to avoid spreading dirt.
Deep carpet cleaning: Narwal Freo Z Ultra has a carpet boost mode. Upon detecting a carpet, the Narwal Freo Z Ultra automatically enhances its suction power to thoroughly clean deep-seated dirt within the carpet fibers. At the same time, the mopping module will be lifted to prevent water stains from wetting the carpet.
Intelligent obstacle avoidance and no-dead-angle cleaning: With its high-precision obstacle avoidance system, the Freo Z Ultra can flexibly avoid obstacles and reduce the user's manual intervention. At the same time, the side sensors increase the cleaning coverage to ensure that every place can be thoroughly cleaned.
Quiet and efficient cleaning: Despite its powerful suction, Narwal Freo Z Ultra is very quiet when cleaning. The noise of its base station is 15% lower than the industry average when working, which is very suitable for users who work at home or need a quiet environment.
[cta:narwal-freo-z-ultra-robot-vacuum-mop]
With these innovative vacuuming functions, Narwal Freo Z Ultra provides an all-round and efficient cleaning experience, making housework more worry-free.
Step-by-Step Vacuuming Guide
- Prepare the Vacuum: Ensure your vacuum’s filter and dust bag are clean. For the Narwal robot vacuum, make sure it’s fully charged.
- Vacuum the Perimeter: Begin by vacuuming the perimeter of the room, where dust often accumulates. Utilize a crevice tool to access narrow spaces and corners.
- Vacuum in a Pattern: When using traditional vacuums, employ long, overlapping strokes to ensure comprehensive floor coverage. On the other hand, the Narwal vacuum will automatically chart out the most efficient cleaning route.
- Vacuum Under Furniture: Don’t forget to move and vacuum underneath any lighter furniture. The Narwal robot vacuum is particularly useful for this step, as it can move effortlessly underneath most furniture.
- Focus on High-Traffic Areas: Carpets and rugs in high-traffic areas are prone to accumulating more dust and dirt. Use Narwal robot vacuum attachment to thoroughly vacuum these spots.
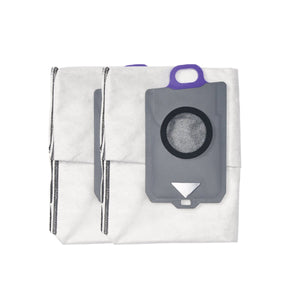
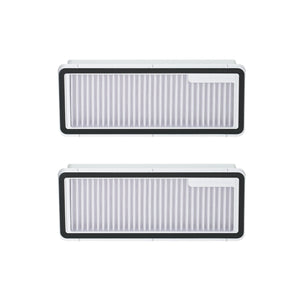
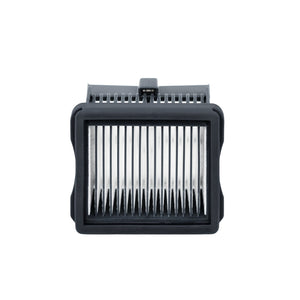
- Empty the Vacuum and Clean the Filters: Regularly empty the vacuum canister or bag to maintain suction power. Don’t forget to clean the filters to prevent clogging and ensure optimal vacuum performance. For robot vacuums, ensure the dustbin is cleaned according to the manufacturer's instructions.
Dusting Tips
To keep your space fresh, dust regularly and use the right techniques. These simple dusting tips can help reduce allergens and improve air quality, making your cleaning routine more effective.
Dust Frequently: Regular dusting helps prevent buildup, which can be harder to remove if left for long periods.
Use Damp Cloths for Stubborn Dust: For areas with sticky dust buildup, lightly dampen your microfiber cloth to trap dust more effectively.
Avoid Dry Dusting: Dry dusting may disperse dust into the air, complicating the cleaning process. Use a cloth that traps dust particles, or lightly dampen it for better results.
Clean Filters: Clean or replace your air purifier filters and HVAC filters regularly to reduce the amount of airborne dust circulating in your home.

Vacuuming Tips
Vacuuming is an essential part of maintaining a tidy home. To enhance your cleaning routine, follow these vacuuming tips to achieve a deeper clean and improve your home’s air quality.
Use a HEPA Filter: To reduce allergens in the air, choose a vacuum with a HEPA filter, which captures finer dust particles.
Change Your Vacuum Bag Regularly: If your vacuum uses a bag, make sure to change it before it gets full to maintain suction power.
Don’t Rush: When vacuuming, proceed slowly to allow the vacuum cleaner to capture more dirt and dust during each pass.
Vacuum Both Directions: For carpets, vacuum in a criss-cross pattern, once horizontally and once vertically, to ensure every fiber is cleaned.
The Best Sequence for Cleaning a Dusty Room
When cleaning a dusty room, following the right sequence ensures that you capture and remove as much dust and dirt as possible. Here’s the best step-by-step order for efficiently cleaning a dusty room:
Preliminary preparation
Organize and organize: Clear out excess debris and throw away or put away unnecessary items. Make sure tea cups, kettles, unfinished food, etc. are covered to avoid dust pollution.
Personal protection: Wear a mask to prevent inhalation of dust. Wear gloves to protect the skin of your hands.
Clean from top to bottom, inside and outside
Ceilings and walls: Use tools such as feather dusters or electrostatic mops to gently brush away dust from ceilings and walls. For high and difficult-to-reach places, you can use a ladder or a vacuum cleaner extension rod.
Top of furniture: Clean dust from the top of furniture such as bookcases and wardrobes to prevent dust from falling onto the cleaned surface.
Electrical and electronic equipment: After turning off the power, use a soft cloth or a special cleaning cloth to gently wipe the surface of electronic equipment such as televisions and computers. Be careful not to use a wet cloth or too much water to prevent damage to the equipment.
Windows and glass: Use glass cleaner or a special glass cleaning cloth to wipe the window and glass surface to ensure a clear view.
Cleaning of key areas
Bedroom: Carefully clean the bedside tables, bed bottoms and other places where dust easily accumulates. Replace clean sheets, quilt covers and other bedding.
Living room: Remove dust and debris from furniture items like sofas and coffee tables. Clean the floor using a vacuum cleaner or a mop.
Kitchen: Wipe down cabinets, stoves, range hoods, and other oil-prone areas. Utilize a specialized kitchen cleaner to guarantee thorough oil removal.
Bathroom: Clean sanitary fixtures including toilets, sinks, and bathtubs. Apply disinfectants to ensure the bathroom is clean and hygienic.
Floor cleaning
Vacuuming or sweeping: Use a vacuum cleaner or broom to eliminate dust and debris from the floor. Begin by cleaning the corners and edges of the room, gradually working towards the center.
Mopping: Use a mop with clean water or a specialized floor cleaner to wipe down the floor. Ensure the floor is spotless and stain-free.
Finishing work
Check the cleaning effect: Carefully check each area to ensure that there is no missed dust and dirt. For places that are not thoroughly cleaned, make corrections.
Arrange cleaning tools: Clean used cleaning tools and store them properly. Throw away or dispose of disposable cleaning supplies.
Ventilation: Open windows or use air purifiers to ensure indoor air circulation. Keep the room dry and fresh.
By following this sequence, you can ensure a comprehensive cleaning routine that tackles dust efficiently and leaves your room spotless.
Tips to Reduce Dust in Your Home
Keeping your home free from dust not only improves air quality but also helps maintain a clean living space. Follow these simple tips to minimize dust buildup and make cleaning easier.
- Use an Air Purifier: Air purifiers with HEPA filters can reduce the amount of dust and allergens in your home by trapping airborne particles.
- Wash Bedding Frequently: Dust mites proliferate in bedding. To reduce their numbers, wash your sheets, pillowcases, and blankets in hot water every week.
- Minimize Clutter: Reducing clutter on surfaces minimizes dust accumulation and makes cleaning easier.
- Groom Pets Regularly: Pet dander contributes to household dust. Regular grooming and brushing your pets will help minimize shedding.
- Close Windows During High Pollen Seasons: Closing windows during pollen seasons helps keep outdoor dust and allergens from infiltrating your home.

Conclusion
By dusting before vacuuming, you ensure that dust particles are captured and removed efficiently, leaving your home fresh and free from allergens. With the right tools like microfiber cloths and Narwal robot vacuums, you can make cleaning easier and achieve superior results with less effort. Start implementing these tips today to maintain a cleaner, healthier, and more pleasant home environment. Ready to make cleaning effortless? Upgrade to a Narwal robot vacuum for the ultimate cleaning experience!
FAQs
What is dust, and where does it come from?
Dust is a combination of tiny particles that accumulate indoors. It typically contains skin cells, pet dander, hair, pollen, lint, and fibers from fabrics, as well as dirt brought in from outside.
How often should you vacuum and dust?
Dusting should be done weekly, while vacuuming depends on the flooring type and the number of occupants or pets. Carpets should be vacuumed at least once a week, while high-traffic areas may require more frequent vacuuming.
Does opening windows reduce dust?
Opening windows may reduce dust temporarily by letting in fresh air, but it can also bring in more outdoor dust, pollen, and pollutants. It’s best to control dust through regular cleaning and the use of air purifiers.


