


Is your robot vacuum missing dirt or making strange noises? The problem often starts with neglected brushes—tangled, worn, or dirty. These small parts have a big impact on cleaning performance and motor health.
This guide covers everything you need to know about robot vacuum brush care: how to clean, when to replace, and how to fix common issues. Using the Narwal Freo Z Ultra as an example, you'll learn practical steps to keep your vacuum working efficiently—no matter the brand.
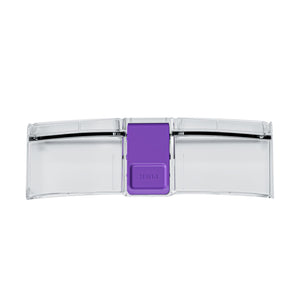
Narwal Brush Design: Built for Easier Maintenance
Before we dive into cleaning and replacing steps, it’s helpful to understand why Narwal’s brushes are easier to maintain than most. Designed with zero-tangle engineering and tool-free removal, they simplify your cleaning routine while improving performance.
|
Feature |
Benefit |
|
Zero-Tangling Aerodynamics |
Prevents hair wrap and clogs, especially helpful for homes with pets |
|
Detachable Brush Modules |
Easily remove and replace brushes without tools or technical skills |
|
Durable, High-Quality Materials |
Maintains shape and performance over time, reducing frequent replacements |
|
Multi-Surface Cleaning Capability |
Works seamlessly on hardwood, tile, carpet, and more |
Whether you're dealing with long hair or daily dust, Narwal’s brush design minimizes manual effort and keeps your robot running smoothly longer.
Step-by-Step Guide: Cleaning Robot Vacuum Brushes (Narwal Freo Z Ultra)
Proper brush care improves cleaning performance and prevents damage. Follow these steps to clean your robot vacuum brushes, including the roller brush and side brushes, using Narwal Freo Z Ultra as an example.
Step 1: Prepare to Clean Your Robot Vacuum Brushes
Get your tools ready and prepare your workspace before you begin. Proper preparation makes the process smoother and prevents accidental damage.
- Turn off the Narwal Freo Z Ultra to ensure safety.
- Turn the vacuum over onto a soft, flat surface, such as a towel, to safeguard both the device and your flooring.
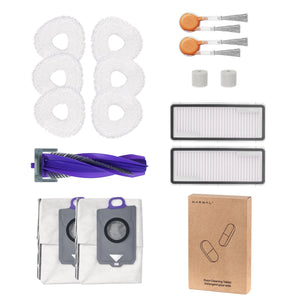
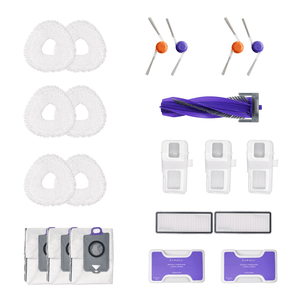
- Gather your tools, including a cleaning brush, scissors, and a soft cloth. If you have the Narwal cleaning tool, use it for easier hair removal.
Once everything is ready, move on to removing the brushes.
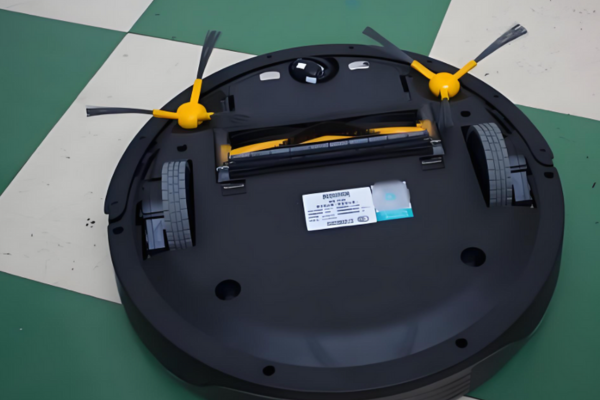
Step 2: Know Your Roller and Side Brushes
Before taking anything apart, let’s get familiar with the two types of brushes in your Narwal Freo Z Ultra. Knowing what they do and where they are will make the next steps much easier.
The Cyclone Tangle-Free Roller Brush is the main brush. It sits in the center on the bottom of the vacuum. This brush picks up most of the dust, hair, and debris from your floors. Thanks to its tangle-free design, it handles long hair better than regular brushes and is easier to clean.
The side brushes are smaller and placed on each side of the vacuum’s base. As the vacuum moves, they spin to sweep dirt out of corners and along walls, pushing it toward the main roller brush for collection.
You’ll be removing both types of brushes for cleaning. Now that you know what they are and what they do, let’s move on to taking them out.
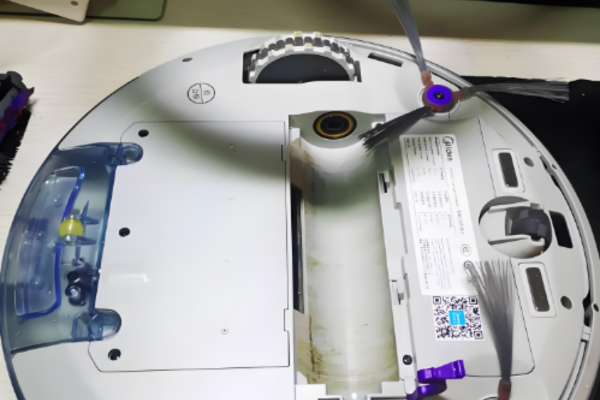
Step 3: Remove the Roller and Side Brushes
To clean the brushes thoroughly, you first need to detach them from the vacuum. This step is quick and straightforward, thanks to the user-friendly design of the Narwal Freo Z Ultra.
-
Cyclone Roller Brush:
- Find the brush housing underneath the vacuum.
- Press the side latch to release the brush guard, then gently pull out the roller brush. Its tangle-free design makes removal hassle-free.
-
Side Brushes:
- Grip each side brush and pull it straight up to detach it from its slot.
- If screws hold the brushes in place, gently unscrew them using a screwdriver.
Now that the brushes are removed, you can focus on cleaning them.
[cta:narwal-freo-z-ultra-robot-vacuum-mop]
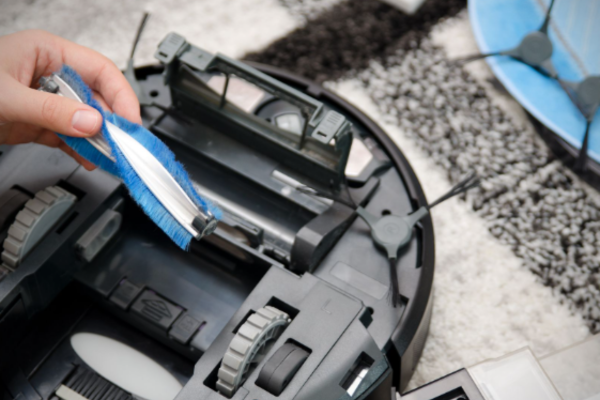
Step 4: Clean the Roller Brush Thoroughly
You should clean the roller brush regularly because it traps most of the dirt and debris.
-
Remove Hair and Dirt:
- Use scissors or your fingers to remove hair from the roller and pull away any debris wrapped around the brush.
- Focus on the brush ends, as hair often gets caught there.
-
Inspect for Damage:
- Check for cracks, missing bristles, or wear on the brush. If you notice any damage, consider replacing it to maintain cleaning performance.
-
Wash if Necessary:
- Wash the brush gently with warm water if it becomes dirty. Avoid using detergents that may damage the materials.
- Let the brush air dry completely before reattaching it. Moisture can harm the vacuum’s motor. You should also keep up with robot vacuum dustbin care, since an overfilled bin can reduce airflow and make brush cleaning less effective.
Once the roller brush is clean, proceed to the side brushes.
Step 5: Clean the Side Brushes Carefully
The side brushes ensure that dirt from corners and edges is swept into the vacuum’s path. Keeping them clean enhances their effectiveness.
-
Remove Debris:
- Manually pull away any hair or dirt tangled around the bristles.
- Use scissors to cut away tightly wound hair for easier removal.
-
Wash and Dry:
- Rinse the brushes under water if they are particularly dirty.
- Allow them to dry completely before reattaching. Wet brushes can cause mold or damage over time.
-
Inspect for Wear:
- Check for bent or damaged bristles. Swap out the side brushes when they show signs of wear.
With both brushes clean, it’s time to focus on the bearings.
Step 6: Check and Clean the Brush Bearings
The brush bearings are small but vital components that allow smooth rotation. Hair and dirt often get stuck in this area, so cleaning them is essential.
- Remove any hair wrapped around the bearings using your fingers or the cleaning tool.
- Clean the bearings and nearby areas with a soft cloth to clear away dust and dirt.
- Ensure the bearings rotate smoothly before reassembling the brushes.
Once the bearings are clean, you’re ready to put everything back together.
Step 7: Reinstall the Roller and Side Brushes
Putting the brushes back into place is as simple as removing them. Follow these steps:
- Align the roller brush with the slots in the brush compartment. Slide it in and ensure it clicks securely into place.
- Insert the side brushes into their slots, pressing firmly or screwing them in if necessary.
- Close the brush guard and ensure it snaps shut.
Keeping your robot vacuum’s roller and side brushes clean helps maintain peak cleaning efficiency, prevents hair tangles, and extends the life of your Narwal. Regular robot vacuum sensor maintenance also helps the vacuum navigate accurately and avoid missing debris after the brushes are cleaned.
Now your Narwal Freo Z Ultra is ready for action with freshly cleaned brushes!
How Often Should You Clean the Brushes?
Your robot vacuum cleaning schedule depends on your household conditions:
-
Weekly: For homes with pets or high foot traffic.
-
Biweekly: For regular households.
The Narwal Freo Z Ultra requires less frequent cleaning thanks to its design that prevents tangles, simplifying upkeep.
How to Replace Robot Vacuum Brushes
Over time, even the best-maintained brushes wear out. Frayed bristles, poor rotation, or loss of suction are signs that your robot vacuum’s brushes need replacing.
Here’s a general guide to replacing both roller and side brushes:
-
Power off the vacuum and disconnect it from the charging dock.
-
Turn it over carefully on a soft surface to access the brushes.
-
Remove the roller brush by releasing any latches or brush guards.
-
Detach the side brushes, which may simply pull off or require a small screwdriver.
-
Install the new brushes, making sure they fit securely in their designated slots.
-
Re-check alignment before turning the device back on.
Example: On models like the Narwal Freo Z Ultra, the roller brush uses a latch-release mechanism, while the side brushes pull straight out without tools.
Tip: Most manufacturers recommend replacing brushes every 6 to 12 months, depending on usage frequency, floor type, and presence of pets.
Troubleshooting Robot Vacuum Brush Issues
Even with regular care, robot vacuum brushes can develop problems that affect cleaning performance. Here are some of the most common brush issues and how to fix them quickly.
|
Problem |
Possible Cause |
Quick Fix |
|
Debris stuck or brush misaligned |
Remove brush, clean it thoroughly, and reinstall it properly |
|
|
Brushes wear out quickly |
Rough surfaces or frequent use |
Replace more often; avoid thick rugs or abrasive flooring |
|
Brush not picking up debris |
Dirty, worn, or loose brush |
Clean the brush and check that it’s securely attached |
|
Side brush bent or loose |
Heat, storage pressure, or age |
Replace the brush and store vacuum on a flat surface |
|
Hair tangled or axle blocked |
Remove brush, clean both ends and bearings, reinstall correctly |
If the brush still doesn’t spin after basic cleaning, it may point to other common robot vacuum issues and require a broader check of the device.
Maintenance Tips for Robot Vacuum Brushes
Proper robot vacuum maintenance, especially brush care, keeps your device running smoothly and prevents performance issues. Here are best practices for long-term brush care:
Replace Brushes on Schedule
Change the roller and side brushes every 6 to 12 months, depending on floor type, cleaning frequency, and presence of pet hair.
Inspect for Wear and Deformation
Check monthly for:
-
Frayed bristles
-
Bent or flattened side brushes
-
Loose brush fittings
Replace brushes if they show visible signs of wear to maintain cleaning effectiveness.
Clean Gently but Regularly
-
Rinse brushes with warm water after every few uses.
-
Use scissors to cut away tangled hair.
-
Avoid harsh chemicals that can degrade plastic or rubber materials.
Keep Bearings and Brush Ends Clear
-
Remove hidden debris or hair near the roller ends.
-
Clean the brush module area where brushes connect to the motor.
Store Brushes Properly
When not in use, store your robot vacuum flat in a cool, dry area to prevent brush warping. For full upkeep, add robot vacuum wheels maintenance to your routine so the unit can move smoothly while the brushes stay aligned with the floor.
By following these simple brush maintenance routines, your vacuum will stay efficient, and your brushes will last longer—with fewer interruptions and cleaner floors. Brush care works best when paired with regular robot vacuum filter maintenance.
Conclusion: Clean Brushes, Consistent Performance
Keeping your robot vacuum brushes clean, intact, and properly installed is essential to maintaining optimal cleaning performance. It’s a simple task that delivers lasting results.
By regularly cleaning, checking for wear, and replacing the roller and side brushes as needed, you ensure your vacuum picks up debris effectively and operates quietly on all floor types.
Using models like the Narwal Freo Z Ultra as an example, it’s clear that good brush maintenance is key to keeping your smart cleaning assistant running like new—without unexpected interruptions.
Make brush care a habit, and your floors will thank you.
FAQs
Can I use third-party brushes with my Narwal Freo Z Ultra?
It’s recommended that original Narwal replacement brushes be used to ensure compatibility and optimal performance. Non-original brushes might not align properly or deliver the same cleaning performance.
How can I prevent hair from tangling on the brushes?
Opt for a tangle-resistant vacuum like the Narwal Freo Z Ultra. The Narwal Freo Z Ultra features a tangle-free roller brush designed to prevent hair buildup by directing strands away from the brush. This minimizes maintenance and ensures smooth cleaning, even in homes with pets or long hair.


