


Ever had the experience where your robot vacuum just seems to wander aimlessly, bumping into table legs and making endless circles? It cleans here, cleans there, but after hours, the floor still looks messy. When the cleaning path isn’t properly planned, it wastes time, energy, and leaves you thinking, “This isn’t a vacuum, it’s a treadmill!”
In fact, the cleaning path is the route the robot follows while cleaning, determining how it avoids obstacles and ensures every area is covered efficiently. Today, we’ll dive into how smart technology can optimize these paths, making your vacuum work smarter, not harder. You’ll learn how initial mapping and scanning help the robot understand your home layout, how dynamic path adjustments allow it to avoid obstacles and boost efficiency, and how smart sensing and cleaning optimization let the vacuum adjust its suction power in real-time to ensure every corner is spotless.
How Does a Robot Vacuum Plan Its Cleaning Path?
Robot vacuums use automated processes for path planning, utilizing advanced navigation systems, sensor technologies, and smart algorithms to ensure efficient cleaning. Let’s break down the step-by-step process of how robot vacuums plan their cleaning paths.
Initial Scanning and Map Creation
When you first start your robot vacuum, it needs to perform an initial cleaning run to scan the entire room. Using technologies like LiDAR (Laser Detection and Ranging), Visual SLAM (Simultaneous Localization and Mapping), or infrared sensors, the robot uses advanced navigation to create a map of the room. This map helps the robot understand the layout of the space, the position of furniture, and the location of obstacles. This step is crucial as it enables the vacuum to plan the most optimal route for cleaning. The robot automatically evaluates the room’s size and shape, identifying walls, furniture, and other fixed objects to ensure it doesn’t collide with anything during cleaning.
Automatic Cleaning Path Selection
Once the map is established, the robot will use the room’s layout, the positions of obstacles, and cleaning needs to determine its cleaning path. Most robots opt for a Z-shaped path to cover larger open areas efficiently. For smaller or cluttered spaces, the robot will use a spiral path, ensuring that every corner is cleaned. If there’s dirt or dust accumulating along the edges of the room, the robot will prioritize edge cleaning to make sure the walls and furniture perimeters are thoroughly cleaned.
Dynamic Path Adjustments During Cleaning
During the cleaning process, the robot continuously adjusts its path based on real-time sensor feedback. If the robot encounters any new obstacles, it will automatically avoid them and recalculate its route. It also uses dirt sensors to detect particularly dirty spots, and when it identifies such areas, it increases its cleaning intensity or alters its path to ensure thorough cleaning. Additionally, the robot adjusts its path in real time based on environmental feedback to avoid repeating cleanings in the same areas and to optimize efficiency.
Cleaning Completion and Auto Return to Charging
Once the cleaning task is finished, the robot evaluates whether it has covered the entire cleaning area. If the battery is low or the task is completed, the robot will automatically return to its charging dock. Many advanced models can resume cleaning exactly where they left off after charging, ensuring that no area is missed and that the room gets a complete cleaning.
Grasping these fundamental techniques helps you pick the most effective cleaning approach for your home.
Configuring Your Robot Vacuum for Optimal Cleaning Paths
After grasping how your robot vacuum operates, the next step is to enhance its efficiency. Most models let you adjust cleaning paths, choose modes, and create zones for better coverage. Here are the key steps to optimize your vacuum’s cleaning path:
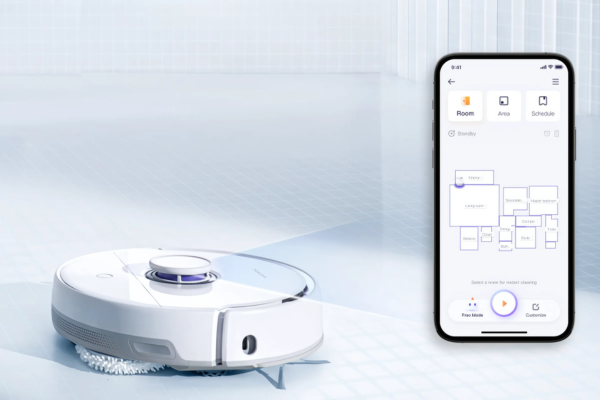
Creating and Adjusting the Map
To start, you must let the robot scan your home. Here's how to fully utilize the robot vacuum map function:
-
Initiate the First Cleaning Run: Start by running the robot for a full cleaning cycle, which could take anywhere from 20 to 40 minutes depending on the size of your home. This initial run will help the robot scan and map your home.
-
Review the Map: After the cleaning is complete, open the robot’s app to view the map. Ensure that all rooms and obstacles are clearly marked. If there are any inaccuracies, you can either move the robot to a different starting point and run the cleaning again or manually adjust the map in the app.
-
Regenerate the Map: If the robot fails to capture all areas, or if the map doesn’t look correct, you can regenerate it. To do this, simply tap the "re-map" or "refresh map" option in the app. Ensure the area is clear of obstacles so the robot can map the space accurately.
Creating No-Go Zones and Cleaning Areas
Once your home map is set up, you can now start designating specific cleaning zones and no-go areas. These features help you ensure that the robot avoids certain spaces or focuses more heavily on others.
-
Add No-Go Zones: Use the app to set virtual boundaries where the robot should not go. This feature is helpful in areas with delicate items, such as cables or small furniture. Draw a no-go zone on the map, and the robot will automatically avoid those spaces.
-
Set Up Priority Cleaning Areas: If certain areas in your home require extra attention, like under the couch or behind the kitchen table, you can set these areas as high-priority. This ensures that the robot cleans these spaces more thoroughly or more frequently.
-
Adjust Cleaning Sequence: You can also prioritize the order in which the robot cleans different rooms. For example, set it to clean your living room or kitchen first, especially if these areas get dirtier faster, and leave bedrooms or hallways for last. This helps you optimize cleaning time based on how frequently different rooms are used.
Choosing Cleaning Modes
Most robot vacuums offer a variety of cleaning modes, each suited for different types of cleaning tasks. Choosing the appropriate mode for each task can boost your vacuum’s efficiency.
-
Standard Cleaning Mode: This is the default setting and works well for regular, light cleaning. It’s perfect for maintaining clean floors between deeper cleanings.
-
Boost or Max Cleaning Mode: If your floors have heavier dirt buildup or you have carpets that need more suction, the Boost or Max mode will increase the suction power to remove stubborn dirt and debris. Use this setting in areas that require a deeper clean.
-
Edge Cleaning Mode: This mode is specifically for cleaning edges along walls or around furniture. It ensures that corners and wall edges, often neglected by other vacuum patterns, are thoroughly cleaned.
-
Custom Cleaning Mode: For areas that require more focus, like high-traffic spots or heavily soiled sections, activate the custom mode. This mode allows you to adjust the robot’s path and cleaning power for specific areas.
Setting the Best Cleaning Schedule for Your Robot Vacuum
To make the most of your robot vacuum’s cleaning path, scheduling the right time for cleaning is crucial. The optimal cleaning schedule ensures that your robot vacuum has enough time to cover all areas efficiently without interruption. Below is a simple guide to help you choose the best cleaning schedule based on your household’s specific needs:
|
Household Type |
Recommended Cleaning Time |
Reason |
|
Busy Professionals |
Every morning before work |
Cleans while you're out, so you return to a clean home. |
|
Families with Pets |
Twice a day (morning & evening) |
Removes pet hair regularly to maintain a fresh, clean home. |
|
Large Homes or Multiple Floors |
Every day (set time, quiet hours) |
Ensures all rooms are cleaned thoroughly. |
|
Homes with Children/High Traffic |
Mid-day and evening |
Cleans high-traffic areas and picks up after meals and playtime. |
|
Minimal Traffic/Light Cleaning Needs |
Every other day |
Cleans periodically without much dirt accumulation. |
Advanced Settings: Using AI and Sensors to Improve Robot Vacuum Cleaning Path
To boost performance, use the advanced AI and sensor features for better path optimization. These technologies allow real-time adjustments, obstacle avoidance, and more thorough cleaning. Here's how to get the best results from them:
AI-Driven Path Optimization
AI-powered robots learn from their environment and adapt to it over time. They are capable of adjusting their cleaning paths based on what they learn, which can increase cleaning efficiency.
-
Automatic Learning and Path Refinement: Over time, AI technology allows the robot to learn the most efficient cleaning paths for your home. For instance, if it detects that a certain area, such as the kitchen, gets dirtier faster, it will prioritize that area and adjust its path to clean it more frequently or with greater intensity.
-
Smart Obstacle Avoidance: AI helps the robot navigate around obstacles like furniture, pets, or walls. If it encounters an obstruction, the robot will automatically change its course to avoid getting stuck, ensuring that the cleaning path remains uninterrupted.
-
Prioritizing Dirty Areas: As the robot learns, it will start to recognize areas that require more cleaning, such as high-traffic zones or areas where dust accumulates quickly. The robot will then adjust its path to clean these areas more thoroughly or revisit them for an additional cleaning pass.
Leveraging Sensors for Real-Time Path Adjustment
The sensors in a robot vacuum are crucial for maintaining an efficient cleaning path. These sensors enable the robot to adjust to changes in its surroundings, like accumulated dirt or sudden obstacles.
-
Ultrasonic Sensors for Dirt Detection: Some robots use ultrasonic sensors to detect dirty spots on the floor. When the robot passes over a particularly dirty area, the sensor will trigger a boost in suction or adjust the cleaning path to ensure that the area is cleaned more thoroughly.
-
Infrared and Collision Sensors: These sensors help the robot detect obstacles in its path, such as furniture, walls, or toys. By sensing these obstacles, the robot adjusts its path to avoid bumping into them, ensuring that it doesn’t waste time or risk getting stuck.
-
Floor Type Sensors: Many robot vacuums come equipped with sensors that detect different types of flooring, like tile, carpet, or hardwood. When the robot detects a change in floor type, it adjusts its cleaning mode to match, ensuring that the correct suction power and cleaning behavior are used for each surface.
Real-Time Path Adjustments
Advanced robot vacuums adjust their cleaning paths in real time based on environmental feedback, making them more responsive and efficient.
-
Collision Feedback: If the robot encounters an obstacle it can’t navigate, it will stop, assess the situation, and adjust its path. This process ensures that the robot doesn’t waste time trying to force its way through an obstacle.
-
Surface Feedback: When the robot detects a particularly dirty or challenging surface, such as a sticky spot on the kitchen floor, it will adjust its suction power and re-clean the area until it’s fully cleared.
AI and sensor technology make your robot vacuum more adaptable, enhancing cleaning efficiency and enabling it to handle various situations independently.
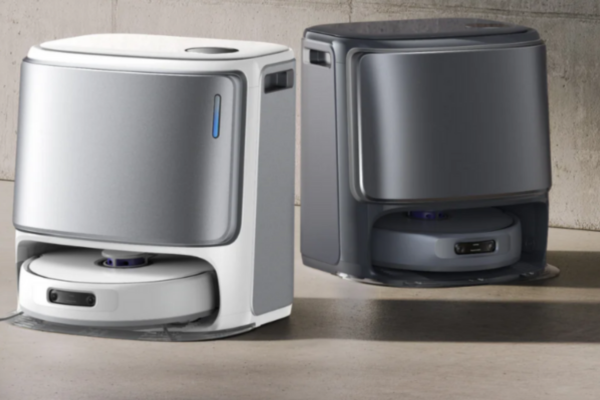
The Latest Model: Narwal Freo Z10
The Narwal Freo Z10 Robot Vacuum & Mop is designed to optimize your cleaning path, ensuring your home gets cleaned more efficiently. It uses advanced navigation to plan its path, avoiding obstacles and adjusting its route for the best results. The Bionic Hand-Wipe System mimics hand movements, so it cleans edges and corners thoroughly, making sure no spot is left behind. It’s especially effective in areas with furniture or walls.
With smart dirt detection (powered by DirtSense 3.0), the Freo Z10 detects dirt levels and adjusts its cleaning power accordingly. This means it cleans heavily soiled areas more intensively while using less power where the surface is cleaner. It also features a hair-free design, preventing tangles on both the side and main brushes, which is great for pet owners or anyone with long hair.
The robot quickly maps your home, ensuring efficient navigation and minimizing cleaning time. It adapts its path in real time, so it doesn’t go over the same area twice, saving time and energy. With these features, the Narwal Freo Z10 ensures that your home is thoroughly cleaned with minimal effort from you.
[cta:narwal-freo-z10-robot-vacuum-mop]
Narwal Freo Z Ultra: Optimized Cleaning Path
-
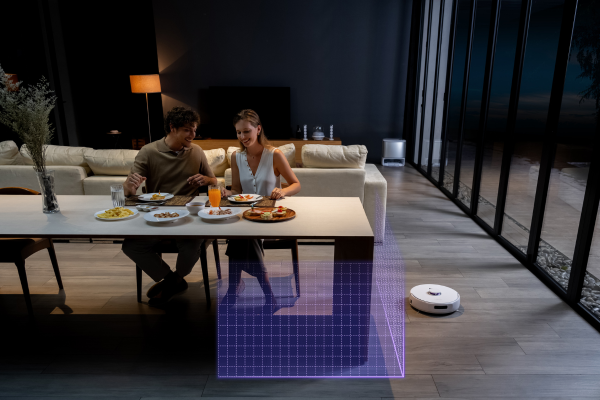
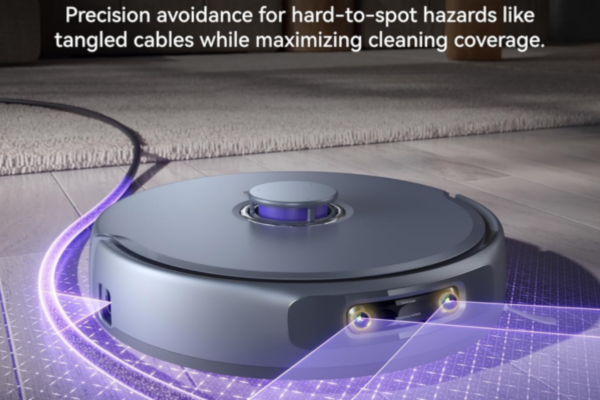
3D Navigation with Millimeter-Level Accuracy
- Dual RGB cameras provide a 3D view of your environment.
- Ensures precise navigation and obstacle avoidance.
- Detects small objects (e.g., chair legs) and recognizes items by color and texture.
-
Real-Time AI Adjustments
- Dual AI chips process data at 4 trillion computations per second.
- Instantly adjusts suction or mopping based on the type of dirt (dust, liquid, etc.).
- Adapts cleaning path in real-time for maximum efficiency without manual intervention.
-
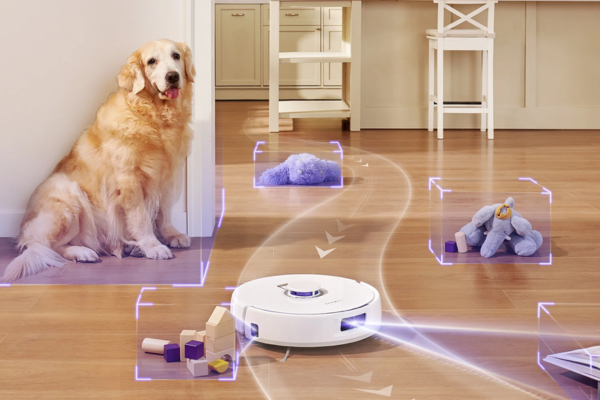
Advanced Obstacle Avoidance
- Detects over 120 objects, including furniture and tight spaces.
- Ensures the robot cleans around obstacles without causing damage.
-
Self-Cleaning and Maintenance-Free
- Self-sanitizing mop after each cycle.
- Self-emptying dustbin automatically disposes of waste.
- Minimizes maintenance needs and guarantees effortless operation.
The Narwal Freo Z Ultra optimizes cleaning paths with its advanced navigation, real-time adjustments, and self-cleaning features, delivering efficient, hassle-free cleaning.
[cta:narwal-freo-z-ultra-robot-vacuum-mop]
Common Issues and Solutions Optimizing Robot Vacuum Cleaning Path
-
How to Avoid Repeated Cleaning
Repeated cleaning often happens due to poor mapping, incorrect settings, or other navigation issues. Ensure the map is accurate and the robot knows which areas are already cleaned. You can also set specific cleaning zones to avoid overlap. -
Blind Spots in Cleaning
Missed spots usually occur around obstacles. To fix this, adjust the cleaning path or clean more frequently in problem areas. Make sure sensors are clean and check if the robot can access all spaces, including under furniture. -
When Cleaning Results Aren’t Ideal
If performance is lacking, try re-mapping or adjusting the cleaning path. Increase suction power or switch to a higher cleaning mode for tougher dirt. Also, check for obstructions in brushes or wheels and ensure sensors are working properly.
Conclusion
You've learned how optimizing your robot vacuum's cleaning path can transform it into a smarter, more efficient cleaner, saving you time and effort. By leveraging initial mapping, dynamic adjustments, and smart sensing, your vacuum can navigate obstacles and cover every corner of your home with precision. This isn't just about cleaning—it's about working smarter, not harder.
Now that you have the tools to maximize your vacuum’s potential, it’s time to put them into action. Don’t let inefficiency hold you back. Take the next step, optimize your cleaning path, and enjoy the freedom of a perfectly cleaned home with minimal effort. Ready for a smarter clean? Start now!


