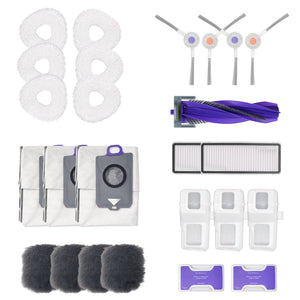
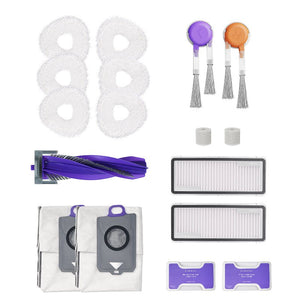
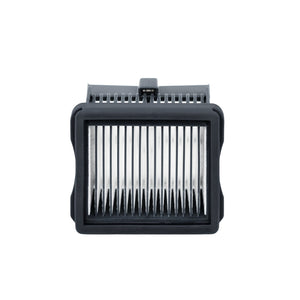
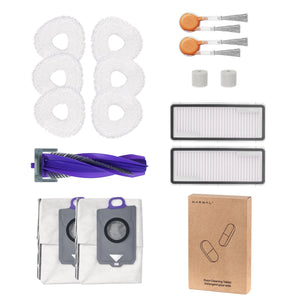
Vacuum losing suction? It’s often the filter. Dirty or damp filters are the #1 cause of weak suction, bad odors, and shorter battery life in robot vacuums like Roomba, Roborock, and Deebot. If you're not cleaning or replacing your filter properly, you're likely cleaning less and wasting more time.
This guide walks you through exactly how to clean, dry, and replace different types of filters—including HEPA and washable ones. You’ll also learn how often to change them, how to spot damage, and how to troubleshoot common issues—step by step.
How to Clean a Robot Vacuum Filter: Step-by-Step Instructions

Here's how to clean a robot vacuum filter—whether it's HEPA, foam, or reusable. Cleaning your robot vacuum filter is essential to keep it running efficiently. Here’s a comprehensive guide to help you clean the filter on your robot vacuum.
-
Turn Off and Unplug: Before starting, turn off your robot vacuum and unplug it from the charging dock. This ensures your safety and prevents any electrical issues during cleaning.
-
Remove the Dustbin: Take out the dustbin from your robot vacuum. This is usually done by pressing a release button or sliding the dustbin out. Check your user manual if you’re unsure how to remove the dustbin.
-
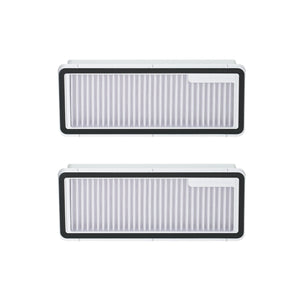
Locate the Filter: Open the dustbin and locate the filter. It’s usually placed inside the dustbin or attached to a specific compartment. Some models have multiple filters (e.g., primary and HEPA filters), so make sure you clean all of them.
-
Remove the Filter: Gently remove the filter from its housing. Depending on the model, you may need to press a latch or slide it out. Handle the filter carefully to avoid damaging it.
-
Tap to Remove Loose Dirt: Take the filter outside and gently tap it against a hard surface to dislodge loose dust and debris. Do this over a trash can or in a well-ventilated area to avoid spreading dust indoors.
-
Use a Soft Brush: Use a soft-bristled brush to gently clean the filter, removing finer particles without damaging it. Avoid using hard brushes or sharp tools, as they can damage the filter material.
-
Rinse the Filter (If Applicable): If your filter is washable, rinse it under lukewarm water until the water runs clear. Do not use soap or harsh chemicals, as they can damage the filter. Let the filter air dry completely before reinserting it.
-
Dry the Filter: Shake off any excess water and place the filter in a well-ventilated area to air dry. Ensure the filter is completely dry before reinserting it to prevent mold or mildew growth.
-
Inspect the Filter: Check the filter for any signs of damage or wear. If the filter is torn or heavily worn, it’s time to replace it. Regularly inspecting the filter helps maintain optimal performance and prevents damage to your vacuum.
-
Reinsert the Filter: Once the filter is completely dry, carefully place it back into the filter compartment. Make sure the filter is properly seated to ensure optimal performance.
-
Reassemble the Dustbin: Place the dustbin back into the robot vacuum, ensuring it clicks into place. Double-check that the dustbin is securely attached to avoid any issues during operation.
-
Test Your Robot: Turn on your robot vacuum and perform a test run to make sure everything is working correctly. If you notice reduced suction power, double-check that the filter is installed correctly.
How To Dry A Vacuum Filter Safely And Quickly:Quick Drying Tips for Busy Homes
After washing your vacuum filter, drying it properly is just as important as cleaning it. A damp filter can cause mold, bad smells, or damage your robot vacuum’s motor. Here's how to dry it the right way:
-
Shake Off Water: After rinsing the filter, shake it gently to remove excess water. This helps it dry faster.
-
Let It Air-Dry Fully: Place the filter in a well-ventilated area. Avoid direct sunlight or heaters, which can damage the material. It usually takes at least 24 hours to dry completely.
-
Don’t Use A Dryer Or Microwave: Never put your filter in a dryer or microwave. High heat can melt or warp the filter and make it unusable.
-
Speed Up With A Fan: Want to dry it faster? Place the filter in front of a fan or near an open window with airflow. This is a safe way to speed up drying without heat damage.
-
Double-Check Before Reinstalling: Always make sure the filter feels completely dry to the touch. If in doubt, give it a few extra hours. Reinstalling a damp filter can cause suction loss or internal damage.
Tip: Some Dyson or Roborock filters may take longer to dry due to thicker materials. Always refer to your model’s manual for best results.
How Often Should You Clean the Filter of Your Robot Vacuum?
Generally, once a week. For homes with pets, allergies, or dusty environments, you may need to clean it 2-3 times a week. Regular cleaning ensures your vacuum maintains strong suction power and prevents dust buildup. Additionally, replace the filter every 3-6 months (or after 120 hours of use for Narwal models) to keep your robot running efficiently. If your vacuum has a companion app, check the filter status for replacement reminders. Keeping your filter clean and fresh means a cleaner home and a longer-lasting vacuum!
Different robot vacuums use different filters—and each type requires its own cleaning routine. Whether yours is HEPA, foam, or cartridge-based, here’s a quick guide to how often to clean and replace them.
|
Filter Type |
Cleaning Frequency |
Washable |
Replacement Interval |
|
HEPA Filters |
Weekly |
No |
Every 3–6 months |
|
Foam Filters |
Weekly |
Yes |
Every 3–6 months |
|
Cartridge Filters |
Monthly |
Sometimes |
Every 3–6 months |
Always check your user manual to confirm whether your filter is washable, and follow brand-specific instructions for best results. In homes with pets or daily heavy use, consider cleaning the filter more than once a week to keep suction strong.
When Should You Replace a Robot Vacuum Filter?
Despite regular cleaning, filters need replacement. Replace filters every 3 to 6 months. If you realize a significant drop in performance or see visible wear and tear, it's time for a new one.
Why Should You Maintain the Filter of Your Robot Vacuum?
Keeping your robot vacuum filter clean is essential for strong suction and a longer-lasting machine. A dirty or clogged filter reduces efficiency, making the vacuum work harder and using more battery.
Regular filter maintenance helps the robot vacuum cleaner capture dust, pollen, and allergens more effectively. Thus, improves air quality.
Maintaining the condition of existing filters helps you avoid costly repairs and extends the time before you need to buy new filters.
According to a study, regularly cleaning and replacing your vacuum filter can improve its efficiency by up to 30%.
How to Troubleshoot Common Filter Issues
Even with regular maintenance, you might encounter a few issues with your robot vacuum filter. Here’s a detailed guide to help you address these problems:
-
Loss of Suction: If your robot vacuum loses suction, check the filter for blockages caused by dust, debris, or pet hair. Clean the filter thoroughly or replace it if necessary. Also, inspect the dustbin and brush roll for clogs, as they can also cause suction issues.
-
Unusual Noises: Unusual sounds may indicate a blocked filter or foreign objects stuck in the vacuum. Remove the filter and inspect it for damage or blockages. Clean or replace it as needed. Additionally, check the brush roll and wheels for tangled hair or debris, as these can also cause noise.
-
Persistent Odors or Mold Growth: Lingering smells or musty odors often mean the filter is saturated with dirt or mold. Soak the filter in a solution of water and vinegar (1:1 ratio) or baking soda for a few hours, then rinse and let it dry completely. If the odor persists, replace the filter, as it may be too worn out to clean effectively.
-
Tough Stains or Residue: For tough stains, use a mild detergent or soap with a soft-bristled brush to gently scrub the filter. Rinse thoroughly with water and let it air dry completely before reinserting. Avoid using harsh chemicals, as they can damage the filter material.
-
Filter Damage or Excessive Wear: If the filter has tears, holes, thinning material, or frayed edges, replace it immediately. Check your user manual for the correct replacement filter and installation instructions. Regularly inspect the filter for signs of wear to avoid performance issues.
-
Improper Drying: If the filter remains damp after cleaning, use a hairdryer on a cool setting or place it in a well-ventilated area for a few hours to dry completely. Never reinsert a damp filter, as it can lead to mold growth and reduce suction power.
-
Filter Not Fitting Properly: If the filter doesn’t fit securely, check for damage or deformation. Replace the filter if necessary, and ensure it’s installed according to the user manual. A loose filter can reduce suction power and allow dust to bypass the filtration system.
-
Reduced Cleaning Performance: If your robot vacuum isn’t cleaning as effectively, check the filter for clogs or damage. Clean or replace it, and also inspect the dustbin, brush roll, and sensors for issues. Regular maintenance of all components ensures optimal performance.
Conclusion
Keeping your home tidy can be easy. Performing routine upkeep can help your robotic vacuum operate efficiently for an extended period. Are you prepared to enhance your cleaning habits? Explore Narwal's latest models and switch today for efficient and reliable cleaning.
Call to Action
With these steps and tips, maintaining your robot vacuum is straightforward. Routine filter maintenance will ensure your home remains clean and your vacuum runs smoothly. Invest in Narwal’s innovative robot vacuums for hassle-free cleaning. For more expert tips and exclusive deals, sign up for our newsletter and follow us on social channels. Looking for the best robot vacuums with HEPA filters in 2025? See our filter and model comparison guide to find one that fits your home.
FAQs
Can I use a hand vacuum to clean the filter?
Yes. You can use a hand vacuum to remove loose dirt from non-washable filters. Be gentle to avoid damage.
What if my filter has a foul odor?
You can rinse washable filters with water. If the smell persists, it might be time to replace the filter.
Can I wash a HEPA filter?
No, the design of HEPA filters can trap fine particles. So, never wash them as water can damage them.
How Do I Know If My Filter Needs Cleaning or Replacing?
If your filter has visible dust or stains but no damage, it likely just needs cleaning. However, if the filter has odors, mold, tears, or thinning material, or if your vacuum’s performance has noticeably declined, it’s time to replace it. As a general rule, if the filter cannot be thoroughly cleaned or is affecting the vacuum’s performance, it’s best to replace it.
What Should I Do If My Filter Is Damaged?
If your filter has tears, holes, or thinning material, replace it immediately. Using a damaged filter can reduce your vacuum’s performance and may allow dust to enter the motor, causing further damage. Always keep a spare filter on hand for quick replacements.
What If the Filter Doesn’t Fit Properly After Installation?
If the filter doesn’t fit properly, first check if it’s deformed or damaged. If so, replace it with a new one. Make sure the filter is installed correctly according to the user manual. If the problem persists, the filter compartment might be damaged, and you should contact customer support for assistance.
How Do I Clean A Roborock Filter?
Remove the dustbin and gently take out the Roborock filter. Tap it clean or rinse it if it’s washable. Let it dry fully before reinserting. For blocked or wet filters, always consult your model’s guide.
How Often Should I Change A Roomba Filter?
Roomba filters should be replaced every 2 to 3 months, depending on use. If you notice a loss in suction or strong odor, it may be time to replace it sooner.
Can I Clean A Deebot Filter With Water?
Some Deebot models come with washable foam filters. If your filter is washable, rinse it with lukewarm water and let it air dry for 24 hours. HEPA filters in Deebot vacuums are not washable.
Can I Put A Vacuum Filter In The Dryer?
No. Never put a vacuum filter in the clothes dryer or microwave. The high heat can melt or warp the filter, making it unusable. Always air-dry your filter in a well-ventilated space.


