


To clean a vacuum brush roll, unplug your vacuum, remove the roller, cut away tangled hair or thread, scrub the bristles, and wipe it dry before reassembly. It’s simple, but skipping this step leads to clogs, weak suction, and brush jams.
In this guide, you’ll find everything you need: how often to clean, what tools to prepare, a step-by-step cleaning process, and tips for safe reassembly. We also cover how to maintain the brush roll long term, what makes certain vacuum brands easier or harder to clean, and how Narwal’s self-cleaning tech saves you the trouble. For stubborn odors or stuck debris, you’ll also get disinfection tips and solutions for when the brush stops spinning.
With this one guide, you can restore your vacuum’s performance and keep it that way.
Why Is It Important to Clean Your Vacuum Brush Roll?
A dirty brush roll is one of the most common reasons your vacuum loses power and stops cleaning effectively.
When hair, pet fur, or threads wrap tightly around the roller, the brush can slow down or stop spinning altogether. This leads to reduced suction, missed dirt on carpets, and extra strain on key parts like the belt, motor, and end caps. Over time, this buildup can even cause your vacuum to overheat or break.
Keeping your brush roll clean helps the bristles spin freely, which means better dust pickup and less wear on your machine. It also helps remove dirt embedded deep in carpet fibers—something a clogged roller simply can’t do.
For best results, check your brush roll regularly and remove any visible debris and hair from the vacuum roller using scissors or a seam ripper. This quick habit can extend your vacuum’s life and keep your home truly clean.
What Should You Prepare Before Cleaning a Vacuum Brush Roll?
Unplug your vacuum first. This is the most important safety step—never skip it. Then, place the vacuum on a flat, clean surface where you can easily see and reach the brush roll. Make sure the area is clear of children and pets.
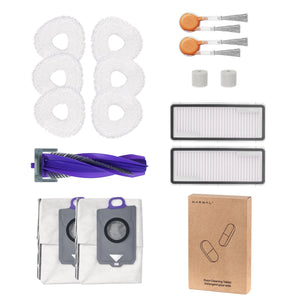
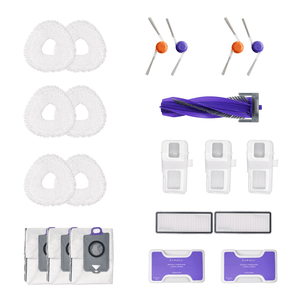
Get your tools ready. You’ll need scissors or a seam ripper to cut away hair and thread. Tweezers help pull out anything stuck tight. Use a small screwdriver to remove the bottom plate or end caps, if needed. A brush or old toothbrush is useful for scrubbing dust off the roller, and a towel lets you wipe parts clean. For deep cleaning, prepare mild soap or diluted vinegar. A handheld vacuum can help remove loose debris.
If it’s your first time, take a quick photo of how the brush and belt are placed before disassembly. That way, you can reassemble everything correctly. Wear disposable gloves if you're dealing with heavy buildup or using cleaning solutions.
Before reassembly, make sure everything is completely dry and securely in place. Skipping these steps can lead to damage or poor suction.
How to Deep Clean a Vacuum Brush Roll: Step-by-Step Guide
To clean your vacuum brush roll properly, follow this step-by-step process. It removes hair, dirt, and buildup while protecting performance.
Before You Start: How to Tell If Your Brush Roll Needs Cleaning
Check your brush roll before disassembling. Cleaning is likely needed if:
- The roller spins slowly or not at all
- You notice tangled hair or thread near the end caps
- Suction seems weaker than usual, especially on carpet
- You smell a burnt or rubber-like odor
- The vacuum makes unusual scraping or grinding noises
These are early signs of buildup that can lead to performance loss or even motor strain if ignored.
Step 1: Turn Off and Flip the Vacuum
Unplug the vacuum and turn it upside down so the brush roll is fully exposed. Never skip unplugging, even if you're just inspecting.
Step 2: Remove the Bottom Plate
Use a screwdriver or release latch to remove the bottom cover. Keep all screws or clips in a safe spot. If the cover feels stuck, don’t force it—check your model’s manual.
Step 3: Take Out the Brush Roll
Lift the brush roll carefully out of its slot. If it’s connected to a belt, slide it out gently without pulling or twisting the belt too much. Place the roller on a clean surface.
Step 4: Cut and Remove Hair or Thread
Inspect the roller for tangled debris. Use scissors or a seam ripper to cut along the grooves, then remove the loosened hair by hand or with tweezers. Don’t pull forcefully near the bristles to avoid damage.
Step 5: Clean Under the End Caps
If your brush roll has removable end caps, take them off and check for hidden buildup. Use a toothbrush or tweezers to clean dust, pet hair, or thread inside the bearing area. Hair caught here often causes the brush to stop spinning.
Step 6: Scrub the Roller Surface
Use a dry brush to clean between bristle rows and remove fine dust. If needed, wipe the roller with a damp cloth and mild detergent or diluted vinegar. Avoid using too much moisture and never soak the roller unless it’s specifically labeled as washable.
If your vacuum uses a soft roller or hybrid brush, avoid sharp tools like seam rippers, they may tear fabric-based surfaces. Always follow material-specific care in your manual.
Step 7: Check for Damage
Look for cracks, bent bristles, or worn-down roller edges. If you see major wear, consider replacing the brush roll. A damaged roller reduces performance and stresses your vacuum’s motor.
Step 8: Let Everything Dry
Dry all cleaned parts thoroughly with a towel, then air dry for at least 30 minutes. Never reassemble with moisture still present—this can cause mold, odor, or internal corrosion.

How to Reassemble and Test the Brush Roll After Cleaning
To reassemble and test your vacuum brush roll after cleaning, make sure all parts are dry, reinstall them in the correct order, and run the vacuum to confirm smooth rotation and proper suction.
Reassemble the Brush Roll
Before reinstalling, double-check that all parts—brush roll, end caps, screws, and bottom plate—are completely dry. Place the brush roll back into its housing, gently guiding the ends into their slots. If your vacuum uses a belt, align it properly over the roller and make sure there’s no twist or slack. The belt should sit snug but not overstretched.
If you removed end caps, press them firmly into place. They should sit flush with no gaps. Reattach the bottom plate or nozzle cover using the original screws or latches. Don’t overtighten—just ensure a secure fit. Before moving on, spin the brush roll manually. It should turn smoothly and evenly. If not, reposition it or check for hidden obstructions.
Test for Smooth Operation
Plug the vacuum back in and place it on a hard floor or low-pile rug. Power it on and observe the brush roll in action. Listen for a steady, quiet rotation—no rattling, no clicking. Check that suction feels strong and that the roller maintains contact with the surface.
If the brush doesn’t spin or the vacuum makes abnormal noises, shut it off immediately. Unplug the unit and recheck roller placement, belt alignment, and the tightness of the end caps. A quick adjustment often solves small issues caused during reassembly and other common robot vacuum issues tied to the brush roll.
Once you’ve confirmed smooth operation, your vacuum is ready to use. This final check ensures optimal cleaning performance and helps protect the motor from unnecessary strain.
How to Maintain Your Vacuum Brush Roll for Long-Term Performance
To keep your vacuum brush roll in good shape, clean it regularly, check for damage, avoid harmful debris, and replace worn parts as needed.
Clean the brush roll regularly. This same habit helps maintain robot vacuum brushes, especially in homes with long hair or pets. Use scissors or a seam ripper to cut along the seams, and pull debris away carefully. Homes with long hair or pets may need more frequent checks.
Inspect key parts during cleaning. Look at the end caps and bearing area for dust or buildup. If they’re removable, wipe them clean. Damaged caps or stuck bearings reduce brush rotation and suction.
Replace worn or noisy parts. If the brush makes unusual sounds, check for loose belts, cracked rollers, or bent bristles. Don’t wait—worn components can stress your vacuum’s motor and reduce cleaning results.
Avoid vacuuming harmful debris. Wet dirt, hard plastic, or string can jam the brush or damage the housing. Stick to dry, solid particles your vacuum is designed to handle.
Use cleaning attachments as needed. For dirt around seams or under the base plate, use soft brushes or the right vacuum tools to reach hidden areas without scratching components.
For hassle-free maintenance, consider models with built-in self-cleaning systems that make it easier to maintain your robot vacuum. Some Narwal vacuums automatically detect buildup and clean the brush roll for you—no cutting or scrubbing needed. This saves time and keeps performance consistent with minimal effort.

How Brush Roll Design Affects Cleaning and How Narwal Makes It Effortless
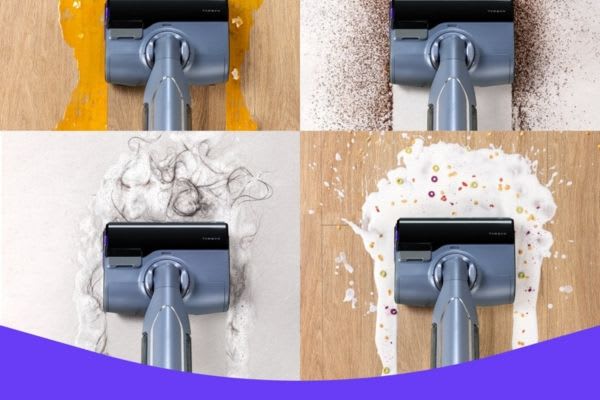
Cleaning a vacuum brush roll is often time-consuming, messy, and varies across brands. While traditional models demand manual cutting and disassembly, Narwal’s brush roll technology in the S20 Pro Vacuum Mop and Narwal Flow redefines the experience—making maintenance nearly effortless with advanced self-cleaning systems.
Traditional Designs Make Cleaning a Chore
Most vacuums from brands like Dyson, Shark, Bissell, and Hoover use roller systems that require users to manually remove hair and debris. These typically involve:
- Fixed end caps or complicated locking mechanisms
- Manual cleaning tools like scissors or seam rippers
- Time-consuming disassembly for brush roll access
Even when premium models offer cleaning grooves or anti-tangle bristles, frequent clogs, wear on belts, and decreased suction remain common issues—especially in households with pets or long hair.
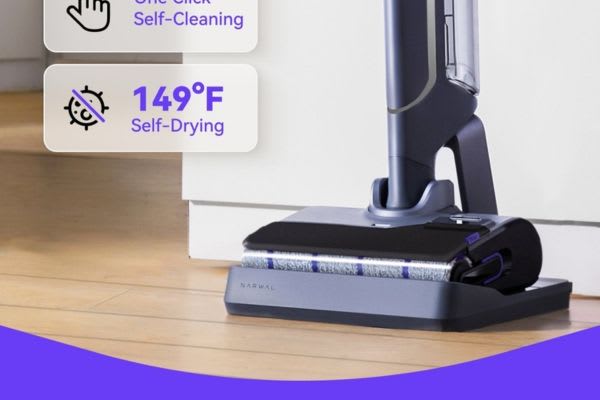
Narwal S20 Pro: Self-Cleaning, No Tangling, Always Fresh
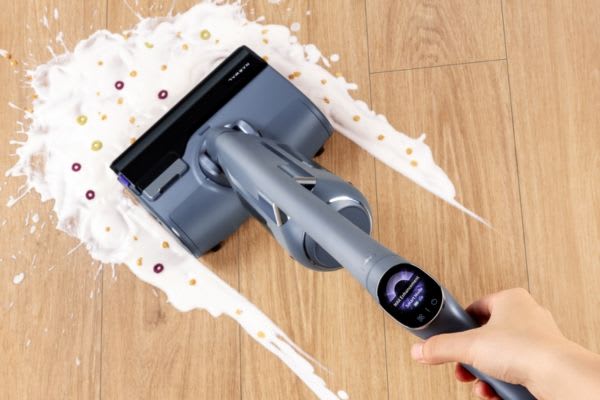
Narwal S20 Pro Cordless Vacuum Mop offers a hands-free brush maintenance system that cleans and heat-dries the brush to 149°F with one touch. Built-in dual combs remove hair during use, and smart DirtSense technology adjusts power based on dirt levels. With zero-tangle certification and automatic solution dispensing, it’s designed for homes that need fast, hygienic, and reliable cleaning—without downtime.
- 20,000Pa suction lifts heavy messes in a single pass
- Self-cleaning and drying system keeps the mop fluffy and odor-free
- No brush roll tangles, even in pet-heavy homes
- Smooth glide and 180° flat reach make cleaning under furniture effortless
- Whisper-quiet operation (43dB) ensures you won’t disturb others while cleaning
Narwal Flow: Real-Time Self-Cleaning Meets Deep Carpet Focus
Narwal Flow goes a step further with a revolutionary FlowWash system that scrubs the mop clean in real-time using 113°F warm water and 12N pressure. Dual RGB cameras and AI-driven navigation dodge obstacles while the CarpetFocus Technology intelligently boosts suction when carpet is detected.
- 22,000Pa hyper suction removes even embedded dirt
- DualFlow tangle-free design with SGS-certified 0% hair entanglement
- Auto mop lifting keeps carpets dry and clean
- Reverse-cleaning system detects and eliminates tough stains
- Quiet drying at 104°F, no mold, no odor
- Maintenance-free base station cleans, dries, refills, and empties—fully automated
With most traditional vacuums, cleaning the brush roll is a task that users dread—and often delay. But with Narwal S20 Pro and Narwal Flow, that task becomes automated, hygienic, and completely touch-free. Whether you’re dealing with tangled hair, daily messes, or sticky stains, Narwal's advanced roller design ensures better results without the maintenance burden.
[cta:narwal-s20-pro-vacuum-mop]
How to Deep Clean and Disinfect Your Vacuum Brush Roll
For stubborn dirt, odors, or pet hair, a basic wipe isn't enough. Deep cleaning and disinfection help restore performance and hygiene.
Start by removing the brush roll and cutting away tightly wrapped hair with scissors or a seam ripper. Use a toothbrush or soft brush to scrub dirt around the bristles, seams, and end caps. For heavier buildup, soak the brush in warm, soapy water (if your model allows), then rinse thoroughly.
To eliminate odors and germs, apply a safe disinfectant such as:
- 70% isopropyl alcohol for quick sanitation
- Diluted white vinegar for deodorizing and loosening grime
- Antibacterial spray for regular maintenance
Avoid harsh chemicals like undiluted bleach or chlorine, which can damage plastic parts. Always let the brush roll and end caps dry completely before reinstalling.
Don’t forget your tools—scissors, brushes, and cloths should also be cleaned or disinfected after use to prevent bacteria transfer.
For pet owners or high-traffic homes, consider deep cleaning monthly or whenever you notice odor, noise, or reduced suction.
What to Do When the Brush Roll Stops Spinning?
The most common cause is tangled hair or debris. Unplug your vacuum, remove the bottom plate, and inspect the brush roll and end caps for blockage. Clean out any buildup and ensure the belt is properly aligned. This usually restores normal function. Regular maintenance keeps the brush roll spinning and protects the motor’s performance.
How Often Should You Clean the Vacuum Brush Roll?
Clean the brush roll every 2–4 weeks. If you have pets, long hair, or thick carpets, increase the cleaning frequency of your brush roll. Clean it immediately if you see tangled hair, notice strange odors, or hear unusual noise. This prevents clogs, protects the motor, and keeps suction strong. Always check your model’s manual for exact cleaning frequency and guidelines.
Make Brush Roll Cleaning One Less Chore
Keeping your brush roll clean is essential, but let’s face it—cutting tangled hair and scrubbing parts isn’t fun. If you’re tired of doing it by hand every few weeks, Narwal offers a better way.
With built-in self-cleaning systems, models like the Narwal S20 Pro and Narwal Flow take care of roller maintenance automatically. Hair is removed, the brush roll is washed and heat-dried after every session, and your hands stay clean the entire time.
Why waste time untangling your vacuum brush? Choose a Narwal vacuum that cleans itself—so you can focus on a cleaner home, not a clogged roller.


